
The Sticker Lady’s top top 10 tips for photos that sell your work!
1.) Clean your Lens
Before you start, make sure that your phone lens is clean. You’d be surprised at how dirty that can get. Fingerprints, dust, and smudges will all affect the quality of your photos. The manufacturer of the phone is going to recommend you use a microfiber cloth to clean it. I use my shirt.
2.) Use Natural Light
I know we can’t always choose this. But if you can, it is the best way to enhance your photo naturally. Avoid direct sunlight, as it can create shadows and highlights. Gloomy days can also get tricky, and I recommend avoiding photos on these days if possible.
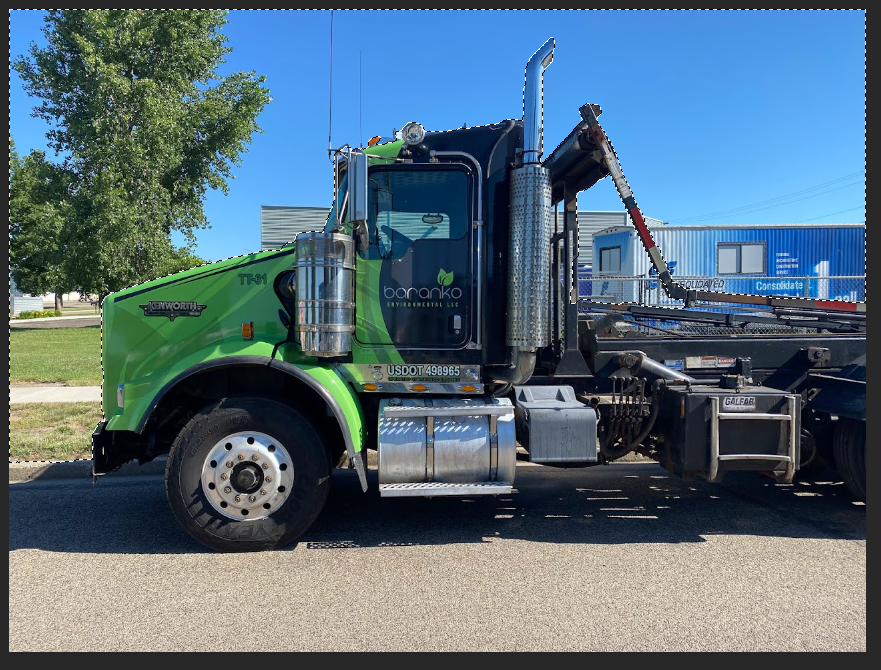
3.) Show Different Angles and Details
Capture multiple shots of your finished project from different angles to provide a comprehensive view. Grab some up close detail shots to show the care that was taken to make the wrap/sign perfect.
4.) Keep it Simple and Consistent
Maintain a consistent style across all of your photos that follows your branding. This helps create a cohesive and professional image.
5.) Edit and Enhance
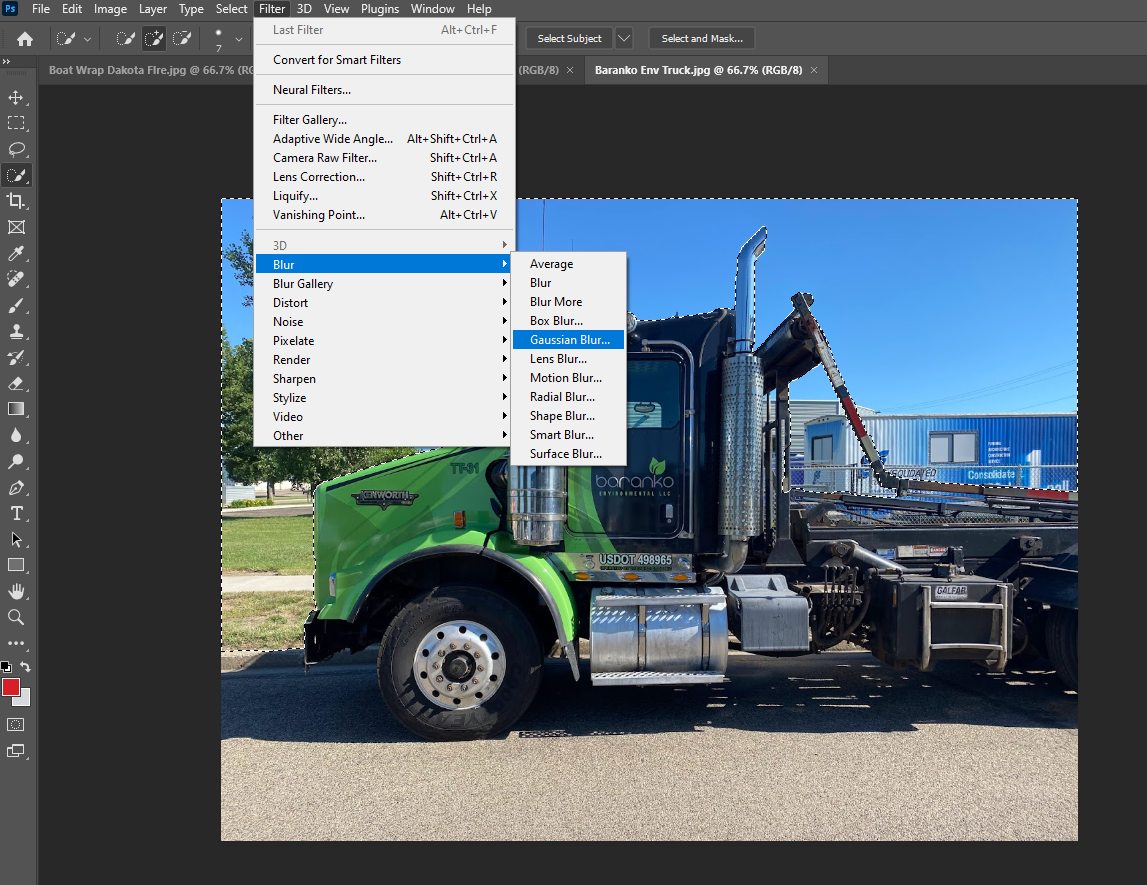
This, for some odd reason, is my favorite part. If on my phone I use an app called PS Express. Otherwise, I upload the photo to my computer and use Photoshop on my desktop. See below for the steps I take:
- Open in Photoshop or photo app
- Create Depth of Field by selecting the background only ( In photoshop, I use the quick selection tool) and adding a gaussian blur / blur. You don’t want to make the background completely unrecognizable, but you do want to make the image jump off the page and let things such as power lines and buildings fade into the back.
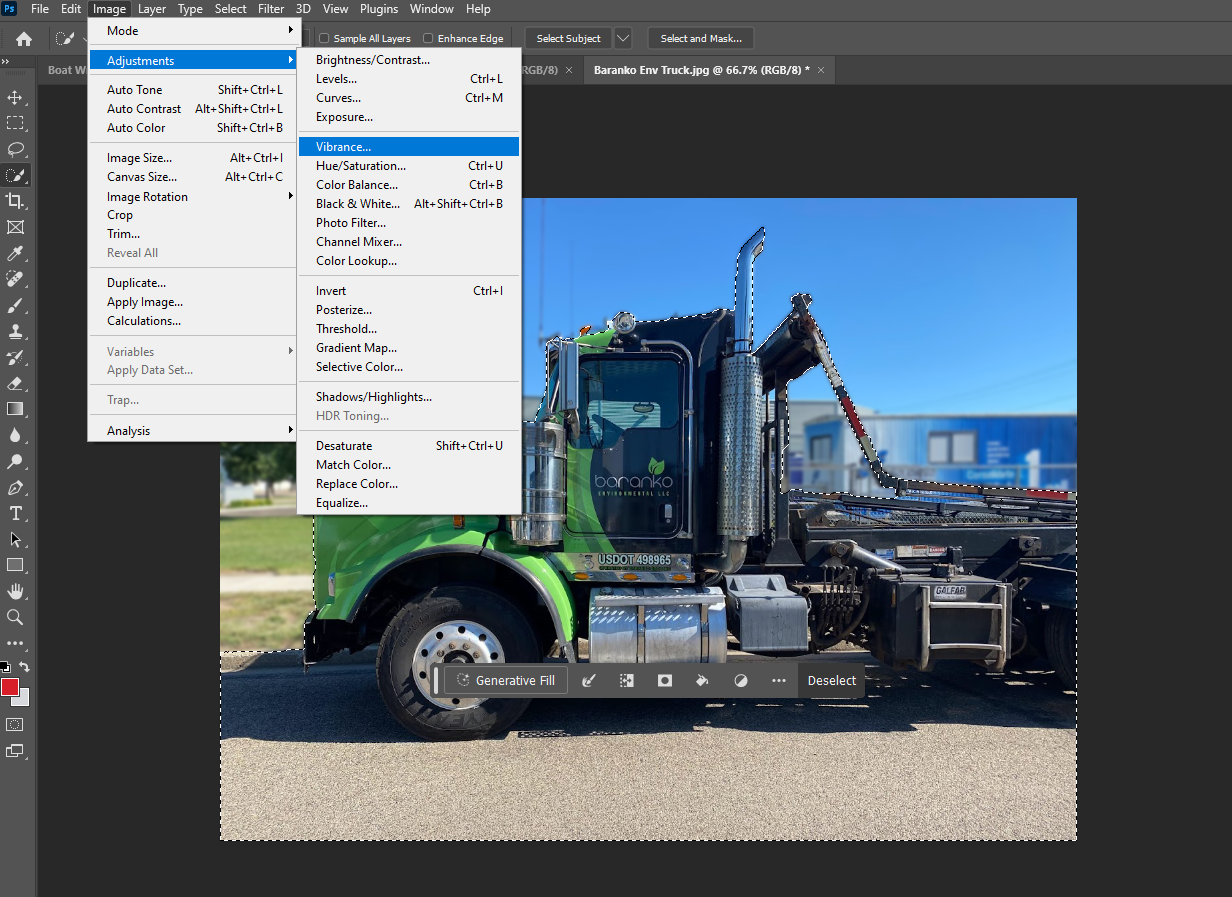
- Next select the object you are highlighting i.e. Sign, Wrap, Graphics. ( if using photo shop, go to select – Inverse )
- Once your object is selected, you can scroll to image/adjustments. From here I add vibrancy, and I increase the exposure if needed to brighten up and enhance the colors in the wrap or sign.
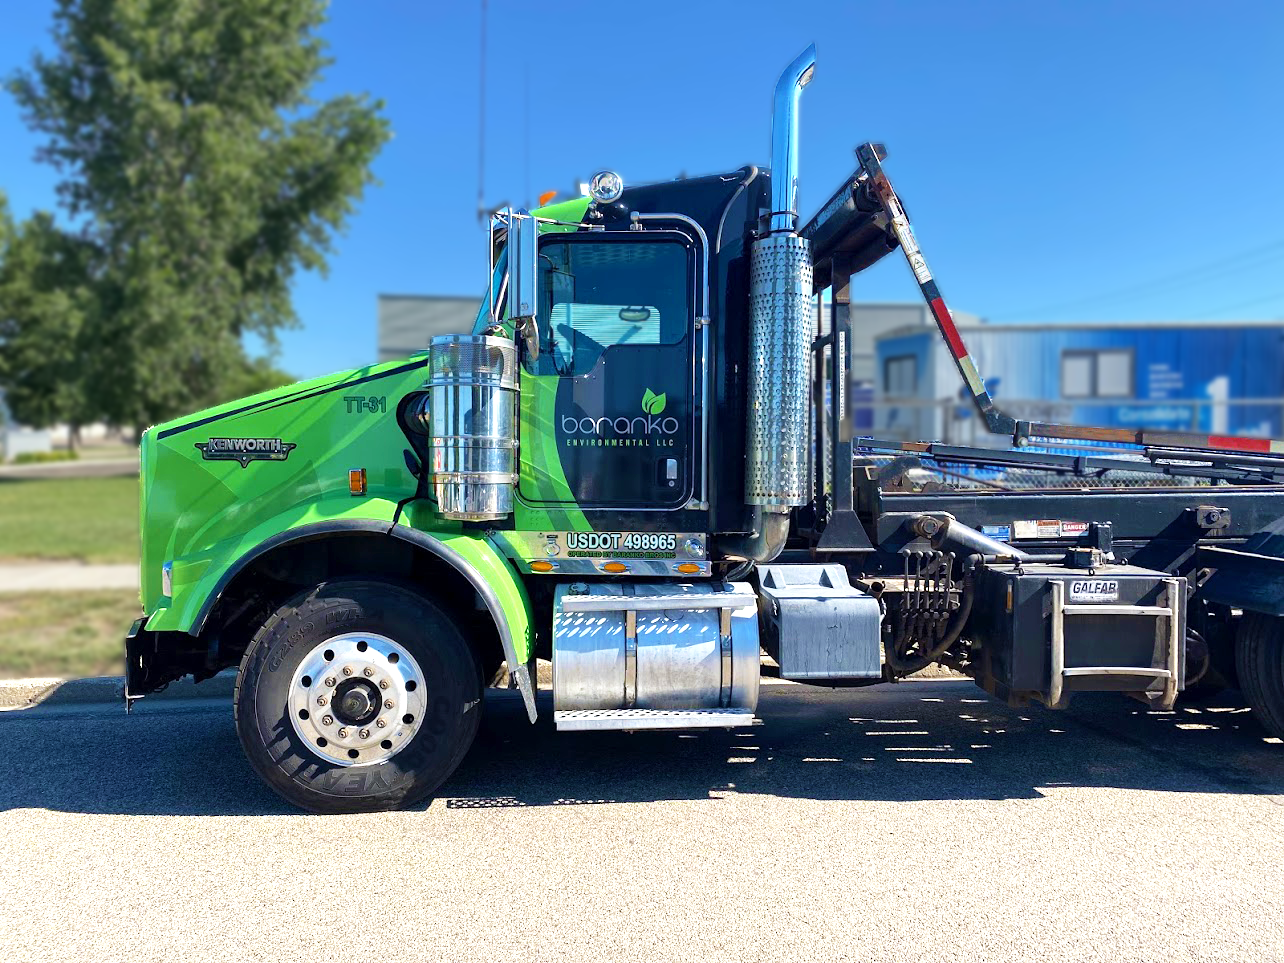
- And now you are ready to upload!
6.) Add to your Web Gallery and Social!
As you can see in the before and after, you naturally get pulled in to the brighter and more vibrant photo with depth of field.

Comments +